

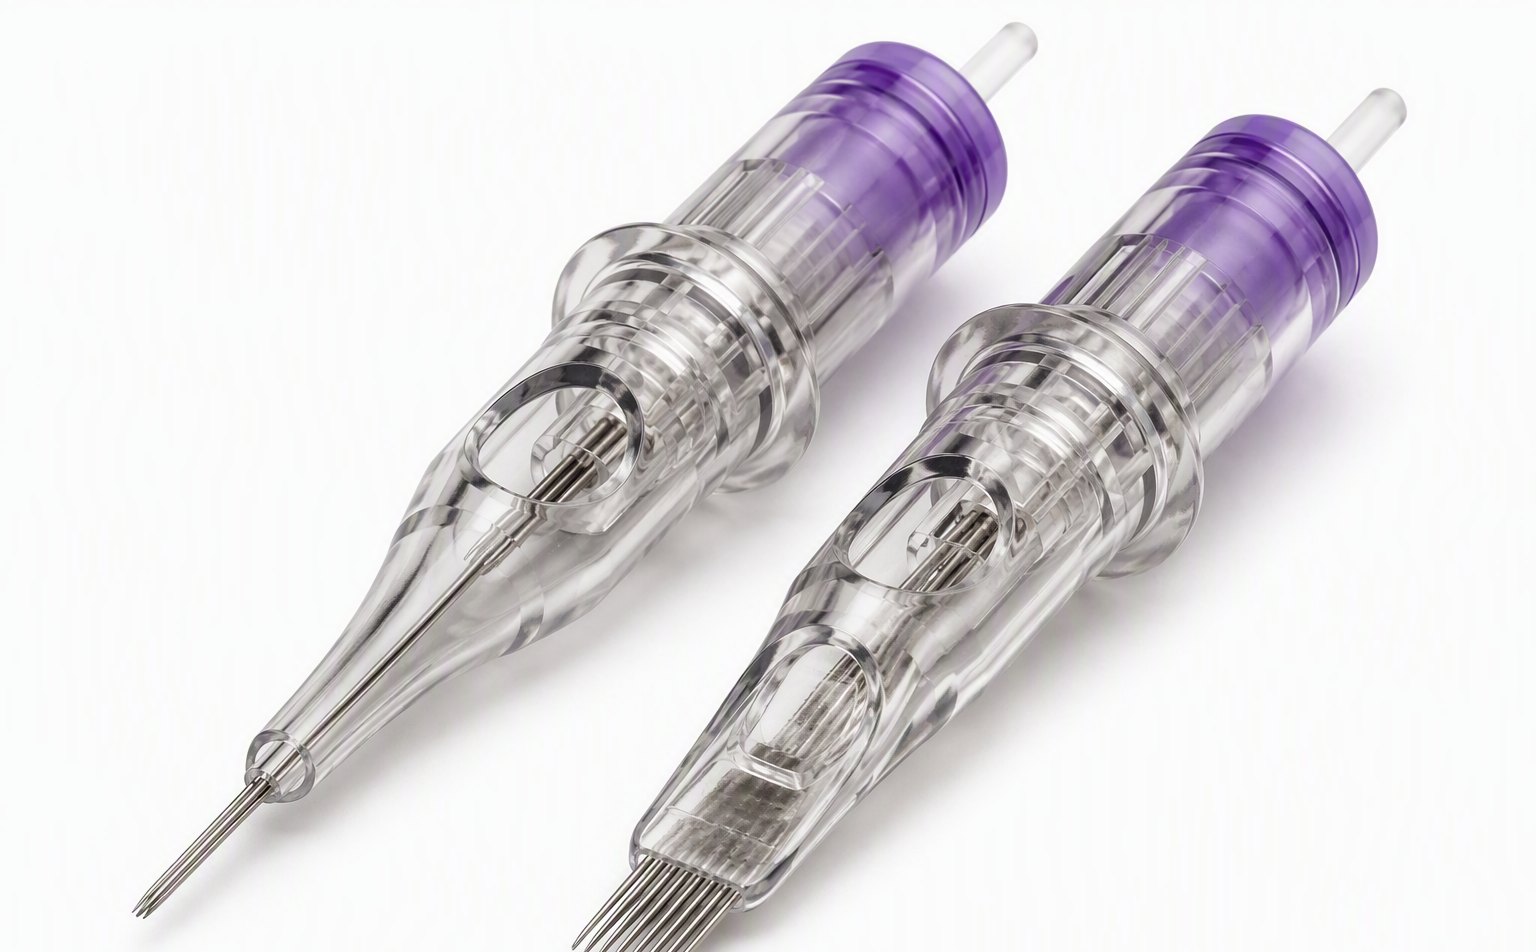
When you look at a tattoo, you notice the lines first. Clean lines hold the whole piece together. Shaky or blown-out lines ruin it, no matter how good the design is. And behind every line is a cartridge most people never think about. We build liner and shader cartridges every day, so here is our plain-language take on how liners work, how they differ from shaders, and why the wrong needle ruins both the art and the skin.
1. The Basics: What Is a Liner?
A Round Liner (RL) is the standard outlining tool. The needles sit in a tight circle and meet at one point. All the ink lands in one concentrated spot, which is why a liner cuts a crisp, clean trail through the skin. A shader spreads the needles over a wider area instead. Small difference in shape, big difference in what happens in the skin.
Cartridge Code Breakdown: 1207RL = #12 gauge (0.35mm) / 7 needles / Round Liner
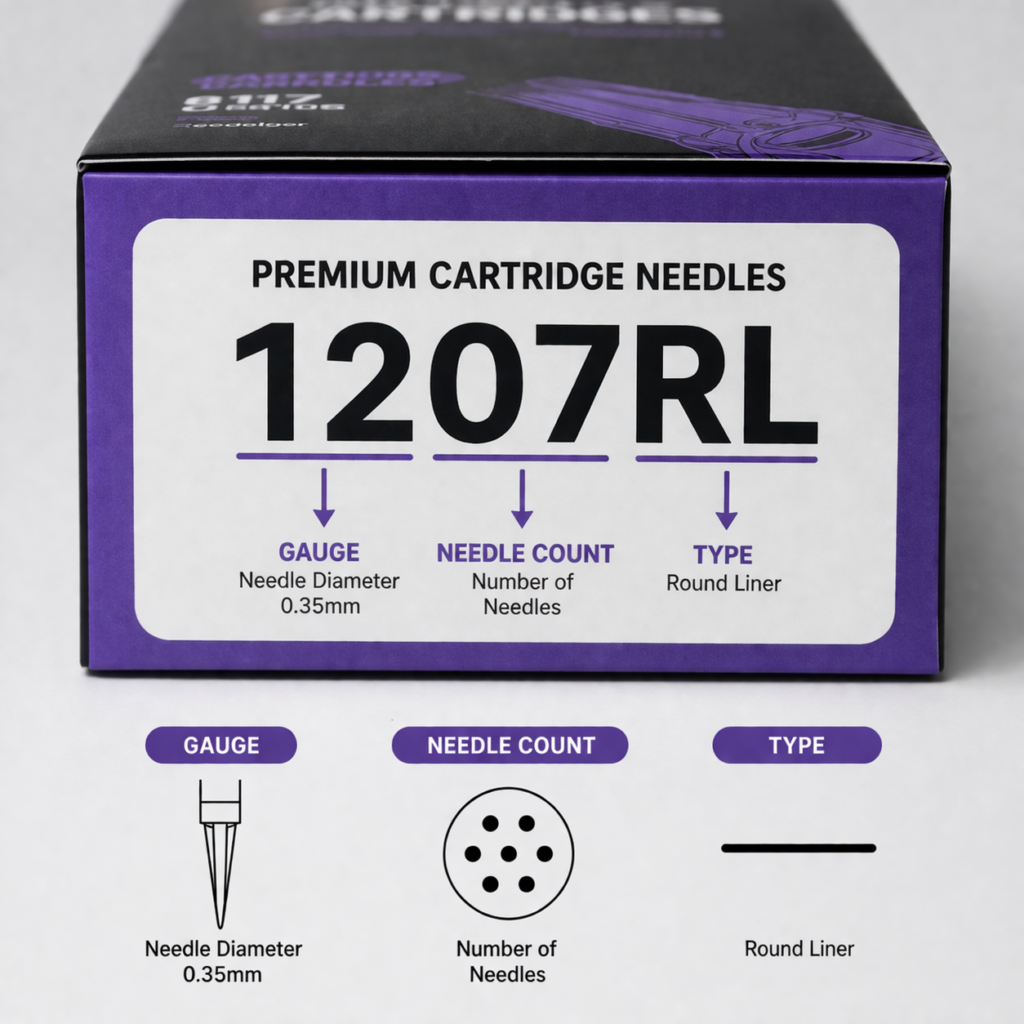
Reading the label is simple once you know the pattern. The first two digits are the gauge. The next two are the needle count. The letters are the configuration: RL is Round Liner, RS is Round Shader, M1 or RM is Magnum. >> See Tattoo Needle Cartridges Size Chart Explained
This matters because a 1207RL and a 1007RL behave differently even though both have seven needles. The #12 pins are thicker, carry more ink, and leave a bolder line. The #10 pins go in easier and leave a finer mark.
💡 Pro Tip
The artists we supply all say the same thing: sort your drawer by gauge first, then needle count. Mid-session, nobody wants to squint at labels. You want to grab by feel.
2. The Anatomy of a Liner
This is where people who buy whatever is cheapest get separated from people who understand their tools. Three specs decide how a liner feels in the skin: needle gauge, taper length, and grouping tightness.
Needle Gauge: The Thickness of the Wire
Gauge is the diameter of each needle wire. The common sizes are #08 (0.25mm), #10 (0.30mm), and #12 (0.35mm), and you can see the difference right away in the skin. A #08 liner leaves hair-thin marks, perfect for single-needle realism and delicate detail. A #12 punches a bold, dark line in fewer passes, which is what you want for American traditional or anything that needs to read from across the room.
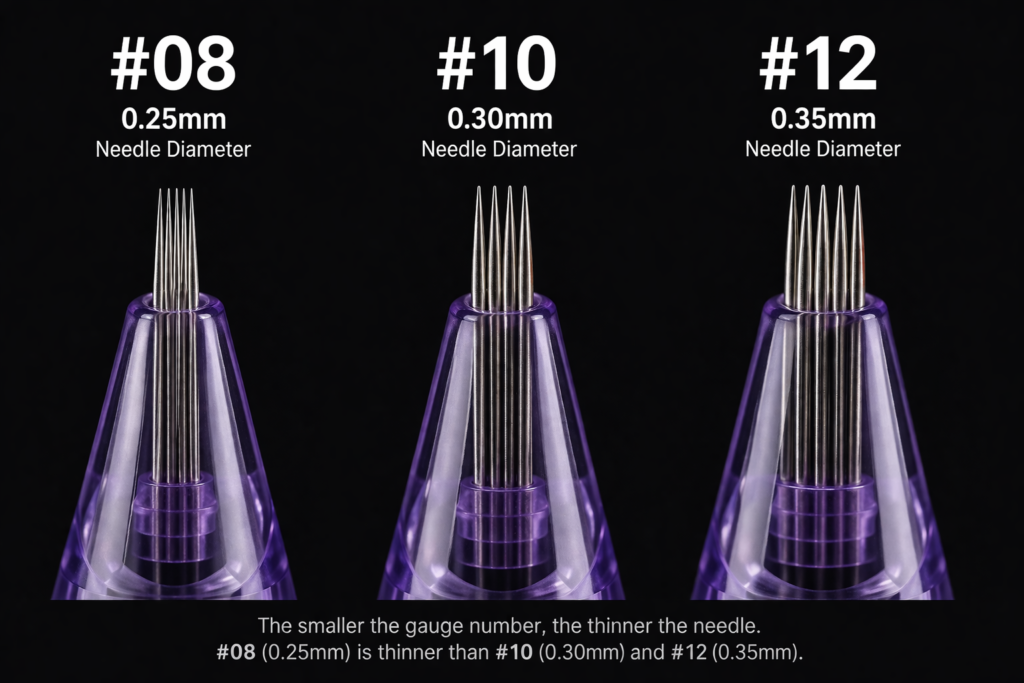
One thing that confuses people: a Bugpin #10 is actually 0.25mm, the same as a standard #08. The numbering systems do not match. Do not assume. Read the millimeter measurement printed on the box.
Taper Length: Why Long Taper Is the Standard
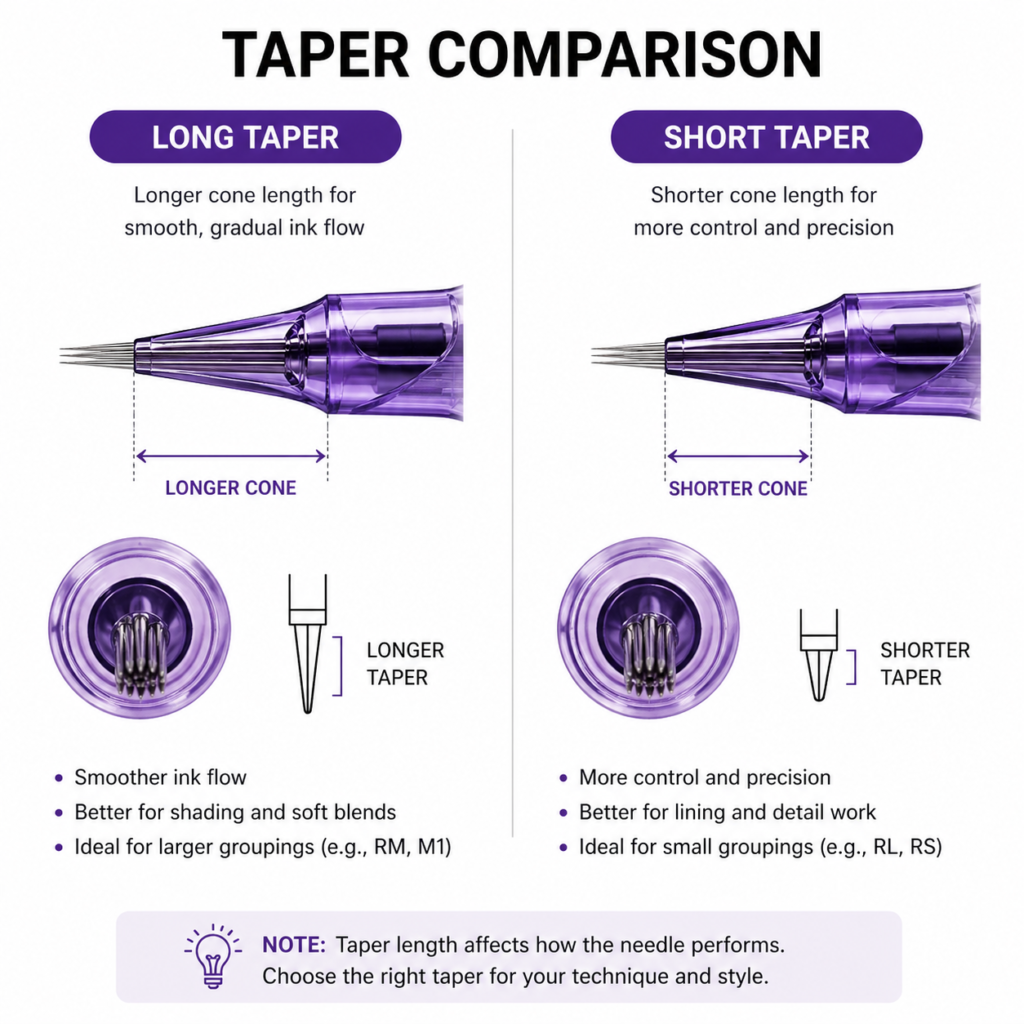
Taper is how long the needle takes to come to a point. A long taper means a sharper, narrower point. It enters the skin with less resistance and less damage. For lining, that is exactly what you want: the line sits clean and the skin heals faster. A short taper is blunter and better for shading, where you want ink pushed into a wider area instead of one precise channel.
Tight vs. Loose Grouping: The Invisible Difference
Two cartridges can both say 3RL and still behave differently. The difference is how tightly the needles are soldered at the tip. A tight grouping keeps all three needles almost touching, so you get one razor-sharp line. A loose grouping lets them fan out a little, and the line comes out softer, almost fuzzy. For crisp outlines, tight wins. Period.
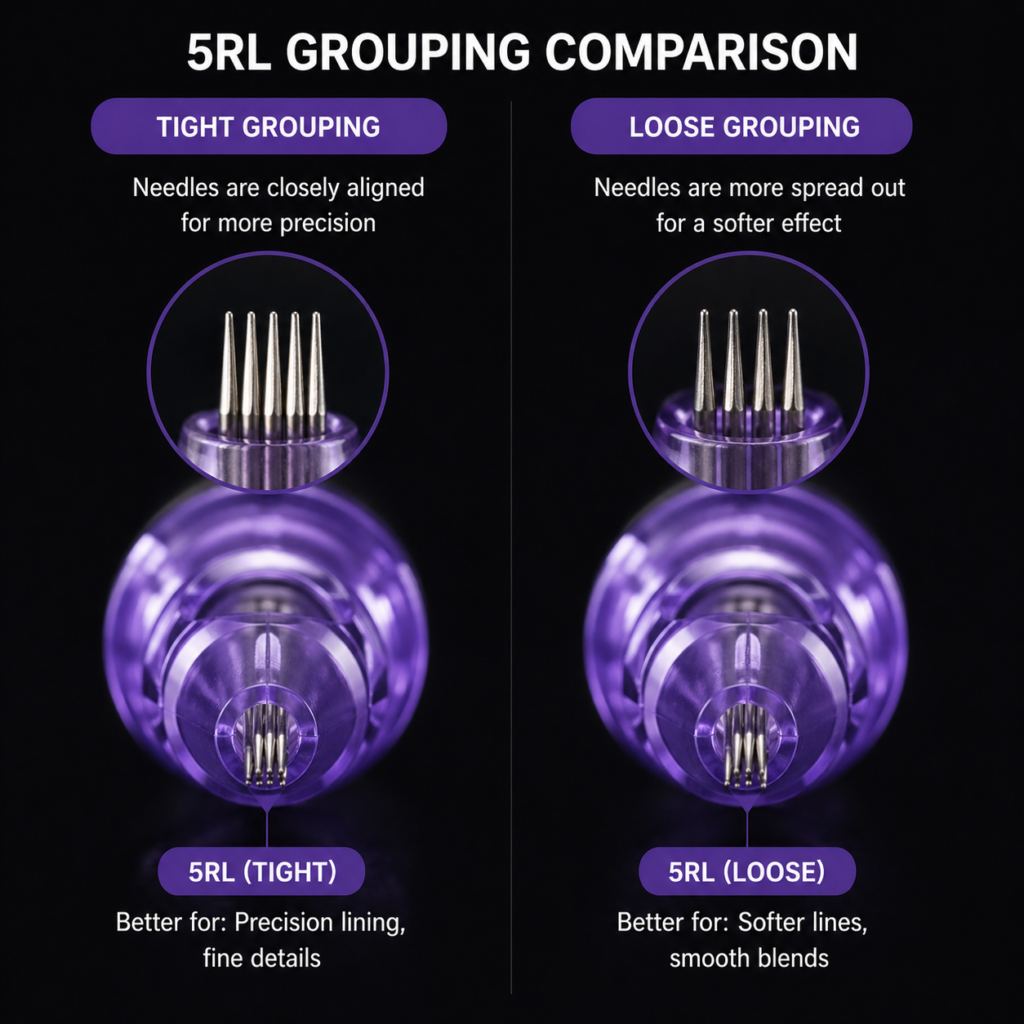
⚠️ The Cheap Cartridge Trap: Budget brands often have inconsistent grouping. One box of 5RL is tight, the next is loose, and your lines change from session to session for no obvious reason. Artists blame the machine. Half the time it is the cartridge. We check grouping on every batch for exactly this reason.
3. Lining vs. Shading: The Core Difference
This part still surprises some apprentices. They think a needle is a needle, grab whatever is loaded, and hope for the best. The skin teaches them otherwise.
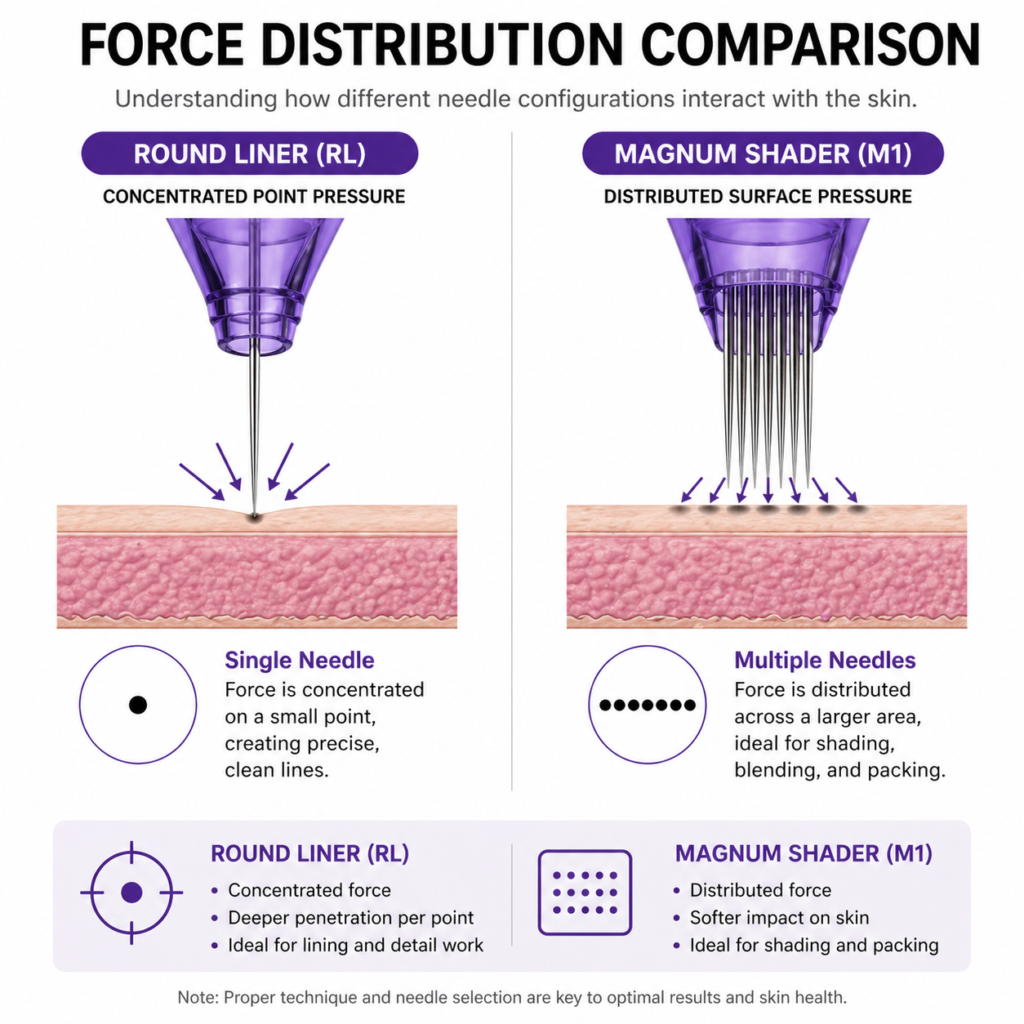
Force Distribution: Point vs. Surface
A liner concentrates all the machine’s force into a tiny cluster of points. The pressure per square millimeter is enormous, so it goes in easily and deposits ink deep in a narrow track. A shader, whether a Round Shader or a Magnum, spreads that same force over a wider area. It does not go as deep per point. It is built to cover surface, not punch a channel.
What Happens When You Mix Them Up
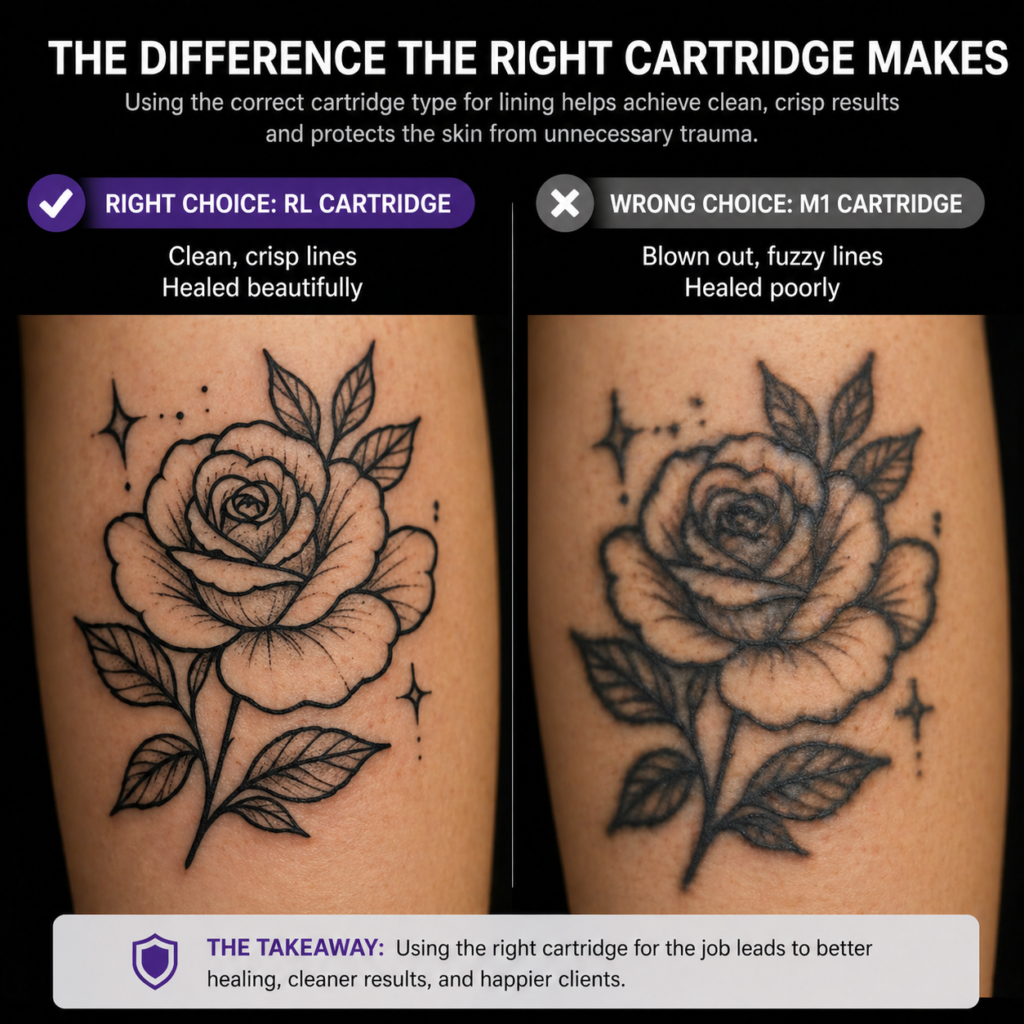
Use a liner to shade and you will chew up the skin. The group is too small, the points too sharp, the pressure too concentrated. You get shredded tissue and blotchy healing. Use a shader to line and you get the opposite problem: the needles never converge enough to leave one clean trail, so the line looks like three or five parallel scratches instead of a single stroke.
>>Click to view the detailed design uses of RL/RS/M1/RM
💡 Pro Tip
Think of it like pens. A liner is a fine-point technical pen. A shader is a marker. You would not sign a document with a Sharpie. Do not outline a tattoo with a Magnum.
4. Special Cartridge Types Worth Knowing
Hollow Liners
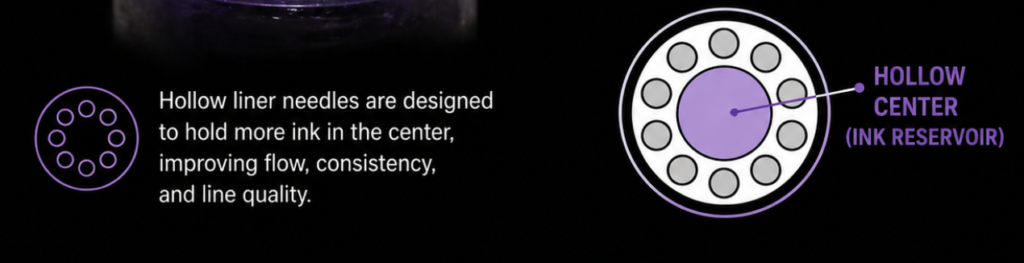
Old-school artists love these for bold, saturated outlines. In a hollow liner, the needles form a ring with empty space in the middle. That space acts as an ink reservoir, so each stroke lays down extra pigment. The result is a heavy, dark line that stays solid after healing. If you do traditional work with thick borders, they are worth trying.
Round Shaders (RS) for Textured Lines
Here the definitions get blurry in a useful way. A Round Shader is technically for shading, but the needles sit in a circle like a liner, just looser. The line it leaves is thicker and slightly textured. Some Japanese traditional artists prefer a loose 5RS or 7RS for bold outlines, because the line has weight and character. Not laser-precise. Hand-drawn. Depending on the style, that is exactly the look.
💡 Pro Tip
One of our long-time customers keeps a small stock of 5RS just for Japanese-style pieces. He tried a tight 5RL once and the lines came out too clinical. The RS gave him that slightly ragged, brushstroke quality his clients actually wanted.
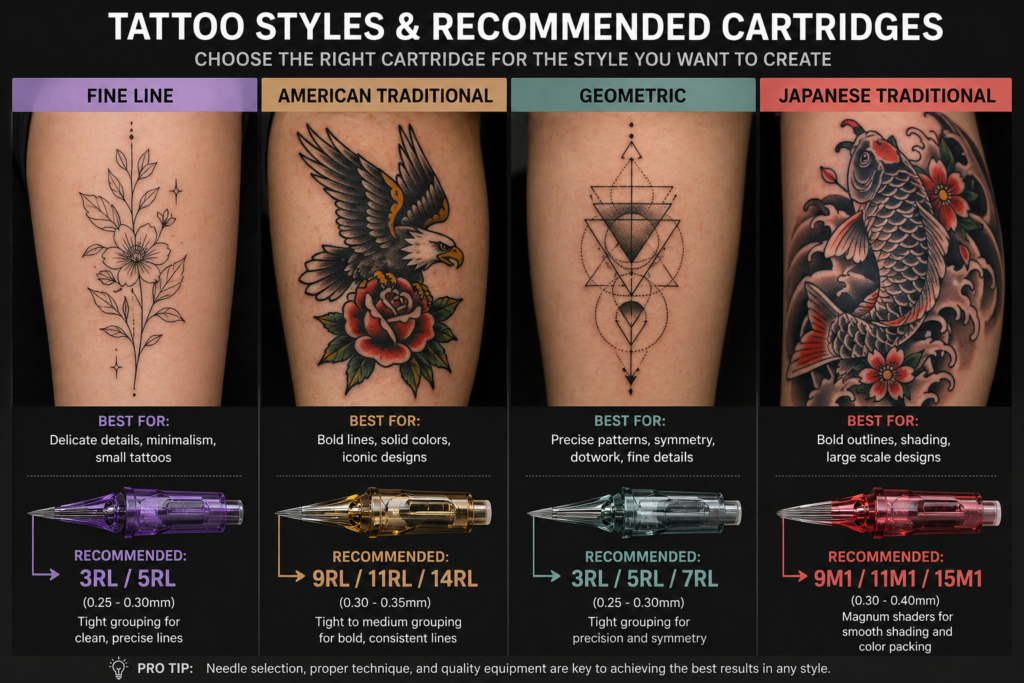
5. How to Choose a Liner by Tattoo Style
Style decides needle choice more than most beginners realize. Here is what the artists we work with reach for, depending on the job.
6. Hardware Quality: Safety and Stability
You can have perfect technique and still ruin a tattoo with a bad cartridge. Two things separate professional needles from junk.
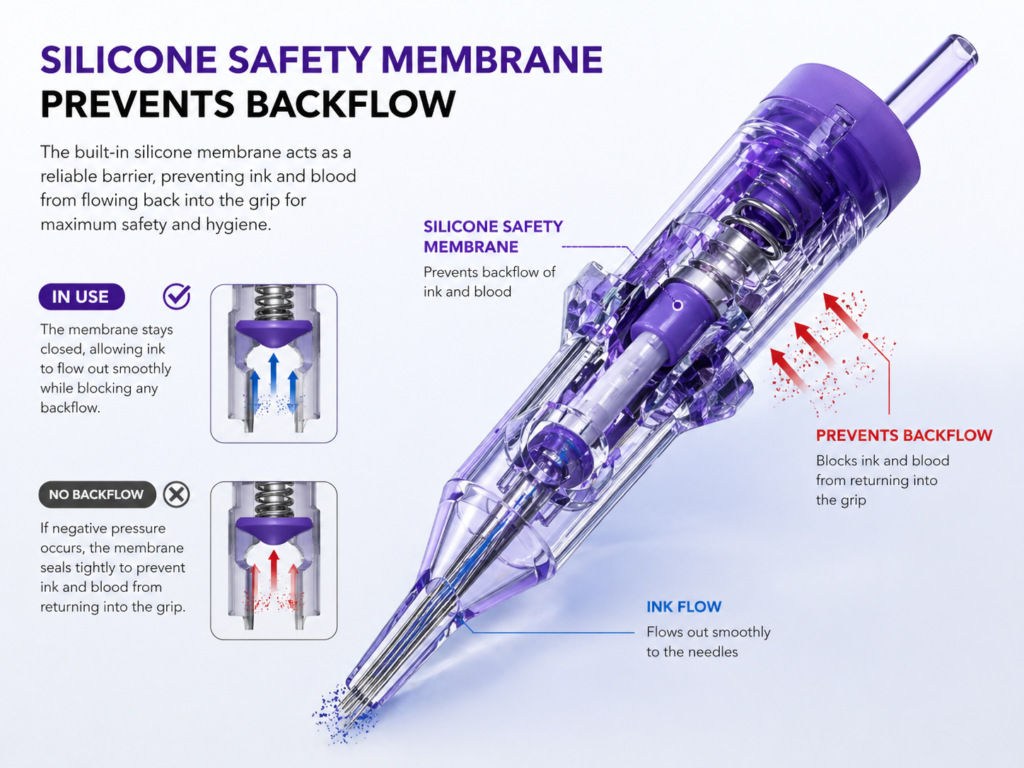
The Safety Membrane
A proper cartridge has a silicone membrane inside the housing. It stops ink and blood from being sucked back into the machine grip. Cross-contamination is not a theory. It happens. We hear from artists who saved a few cents on no-name cartridges and ended up with contaminated grips. The membrane is not optional. It is basic safety.
Needle Stability (Wobble)
Cheap cartridges have loose housings. The needle bar rattles inside, and when the machine runs, the tip vibrates in a tiny oval instead of moving straight up and down. Your lines come out with micro-serrations. From a few feet away the line looks fine. Up close it is jagged. Good housings are molded to tight tolerances so the bar fits snug. That stability is what lets you pull a straight line, and it is why we hold our own housing molds to within 0.05mm.
⚠️ Warning: If you hear a faint rattling sound from your cartridge while running, that is wobble. Do not use it for precise work. Save it for practice skins or throw it out.
7. Common Lining Mistakes and How to Avoid Them
New artists blame the machine first. In reality, most bad lines come from setup errors that take thirty seconds to fix. >> See How to Install Tattoo Cartridges in 30 Seconds
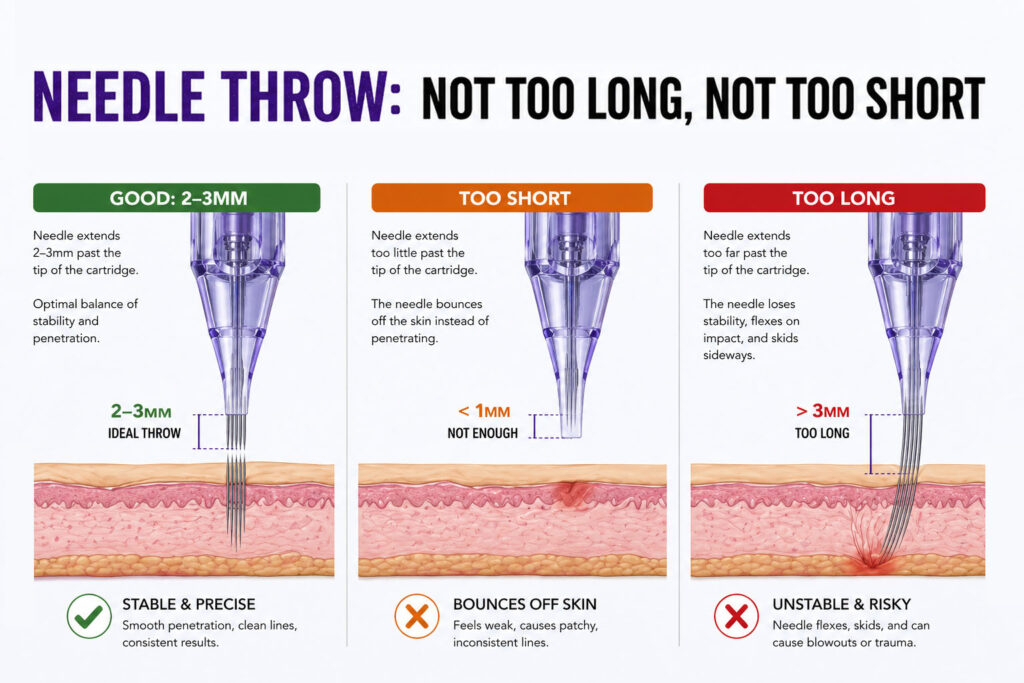
Needle Throw: Not Too Long, Not Too Short
Throw is how far the needle tip sticks out past the cartridge tip. Too short and the needle bounces off the skin instead of going in, so lines come out patchy. Too long and the needle flexes on impact and skids sideways. Most artists we work with start with the needle hanging 2 to 3 millimeters past the tip, then adjust for the cartridge and the area.
Voltage and Hand Speed
Lining usually needs more voltage than shading. The needle has to punch through the epidermis fast and retract before the skin pushes it out. Voltage too low and you drag the needle, so the line expands and blows out. Hand too slow for the voltage and you stack too many punctures in one spot, so the line gets thick and blurry. Match hand speed to the machine cycle. A common setup among our customers: the liner runs about 1.5 volts higher than the shader.
Needle Angle
The cartridge should meet the skin at roughly 45 to 60 degrees. Too upright and the needle digs too deep, which means fat lines and possible scarring. Too flat and the needle skims the surface, so the ink sits in the epidermis and falls out during healing. After a few years, artists tell us they feel the right angle more than they see it.
💡 Pro Tip
For fine-line work, many artists we supply prefer a Bugpin #10 3RL. The 0.25mm gauge gives the delicacy, but the Bugpin sizing has slightly more body than a standard #08. It forgives small hand shakes without looking chunky.
Final Thoughts
Choosing a liner is not about finding the best needle. It is about finding the right needle for the skin, the design, and the line in front of you. A #12 9RL is a beautiful tool for bold traditional work and a disaster for single-needle realism. Know your specs, test on practice skin before you commit to a client, and pay attention to what the needle tells you through the machine. The feedback is there if you listen.